How To: Sew a Mini Stuffed Owl
Howdy Ya’ll! Hope your week is going well!
I’m so glad the work week is half-over already! This past weekend, we traveled to Nashville for a long weekend of fun! I had never been there and Nashville was at the top of my list for our next vacation. It was everything I had hoped it would be… amazing music, rich history, great food, late nights and relaxation! I will be sure to share some photos of our adventures very soon!
Now that vacation is over, we are back in full-swing this week! I am hosting a baby shower at work tomorrow and have been working feverishly to finish up the decorations, gifts and of course some sweet treats!
I wanted to share a little sneak peek with you. The mother-to-be is expecting her first, a baby girl to be named Evie. I am working with a couple other girls at work to create a baby shower that matches her nursery decor and our treats are themed after her cravings throughout her pregnancy! I can not wait to surprise her!
She is using owls in her nursery. So as part of the decor for the shower I wanted to make a stuffed baby owl for her and baby. I’m so excited to finally be sharing a sewing project with you! Sewing is one of my favorite hobbies but it seems I spend the least amount of time doing it.

How To: Sew a Mini Stuffed Owl
You will need:
2 different fabrics (I used a tan linen fabric for the body and burlap for the breast of the owl)
2 buttons for eyes
thread and needle
scissors
pencil
sewing machine (optional: can be done completely by hand)
Directions:
1) Cut out the body for the owl as large as you would like. Should be oval-shaped with a slight point at one end – CUT TWO. Keep it mind it will shrink in size as you stuff it.


2) Next, cut our a smaller oval for the breast of the owl. Sew this piece on top of one of the “body” pieces previously cut.

3) Place the front face side of the two “body” pieces together (will be inside out). Sew around the outside edge leaving a small hole for stuffing.

4) Turn the owl right side out and stuff filling through the small reserved hole. I used a small pencil to make sure the point for the nose was pushed out completely. NOTE: Stuff only bottom half so the top will fold down to form the nose.


5) Use a needle and thread to tack down the beak to body. Also, finish sewing up the side of the owl.


6) Placement of the button eyes – this is very important in terms of your owl’s personality! See how much the placement affects the look…
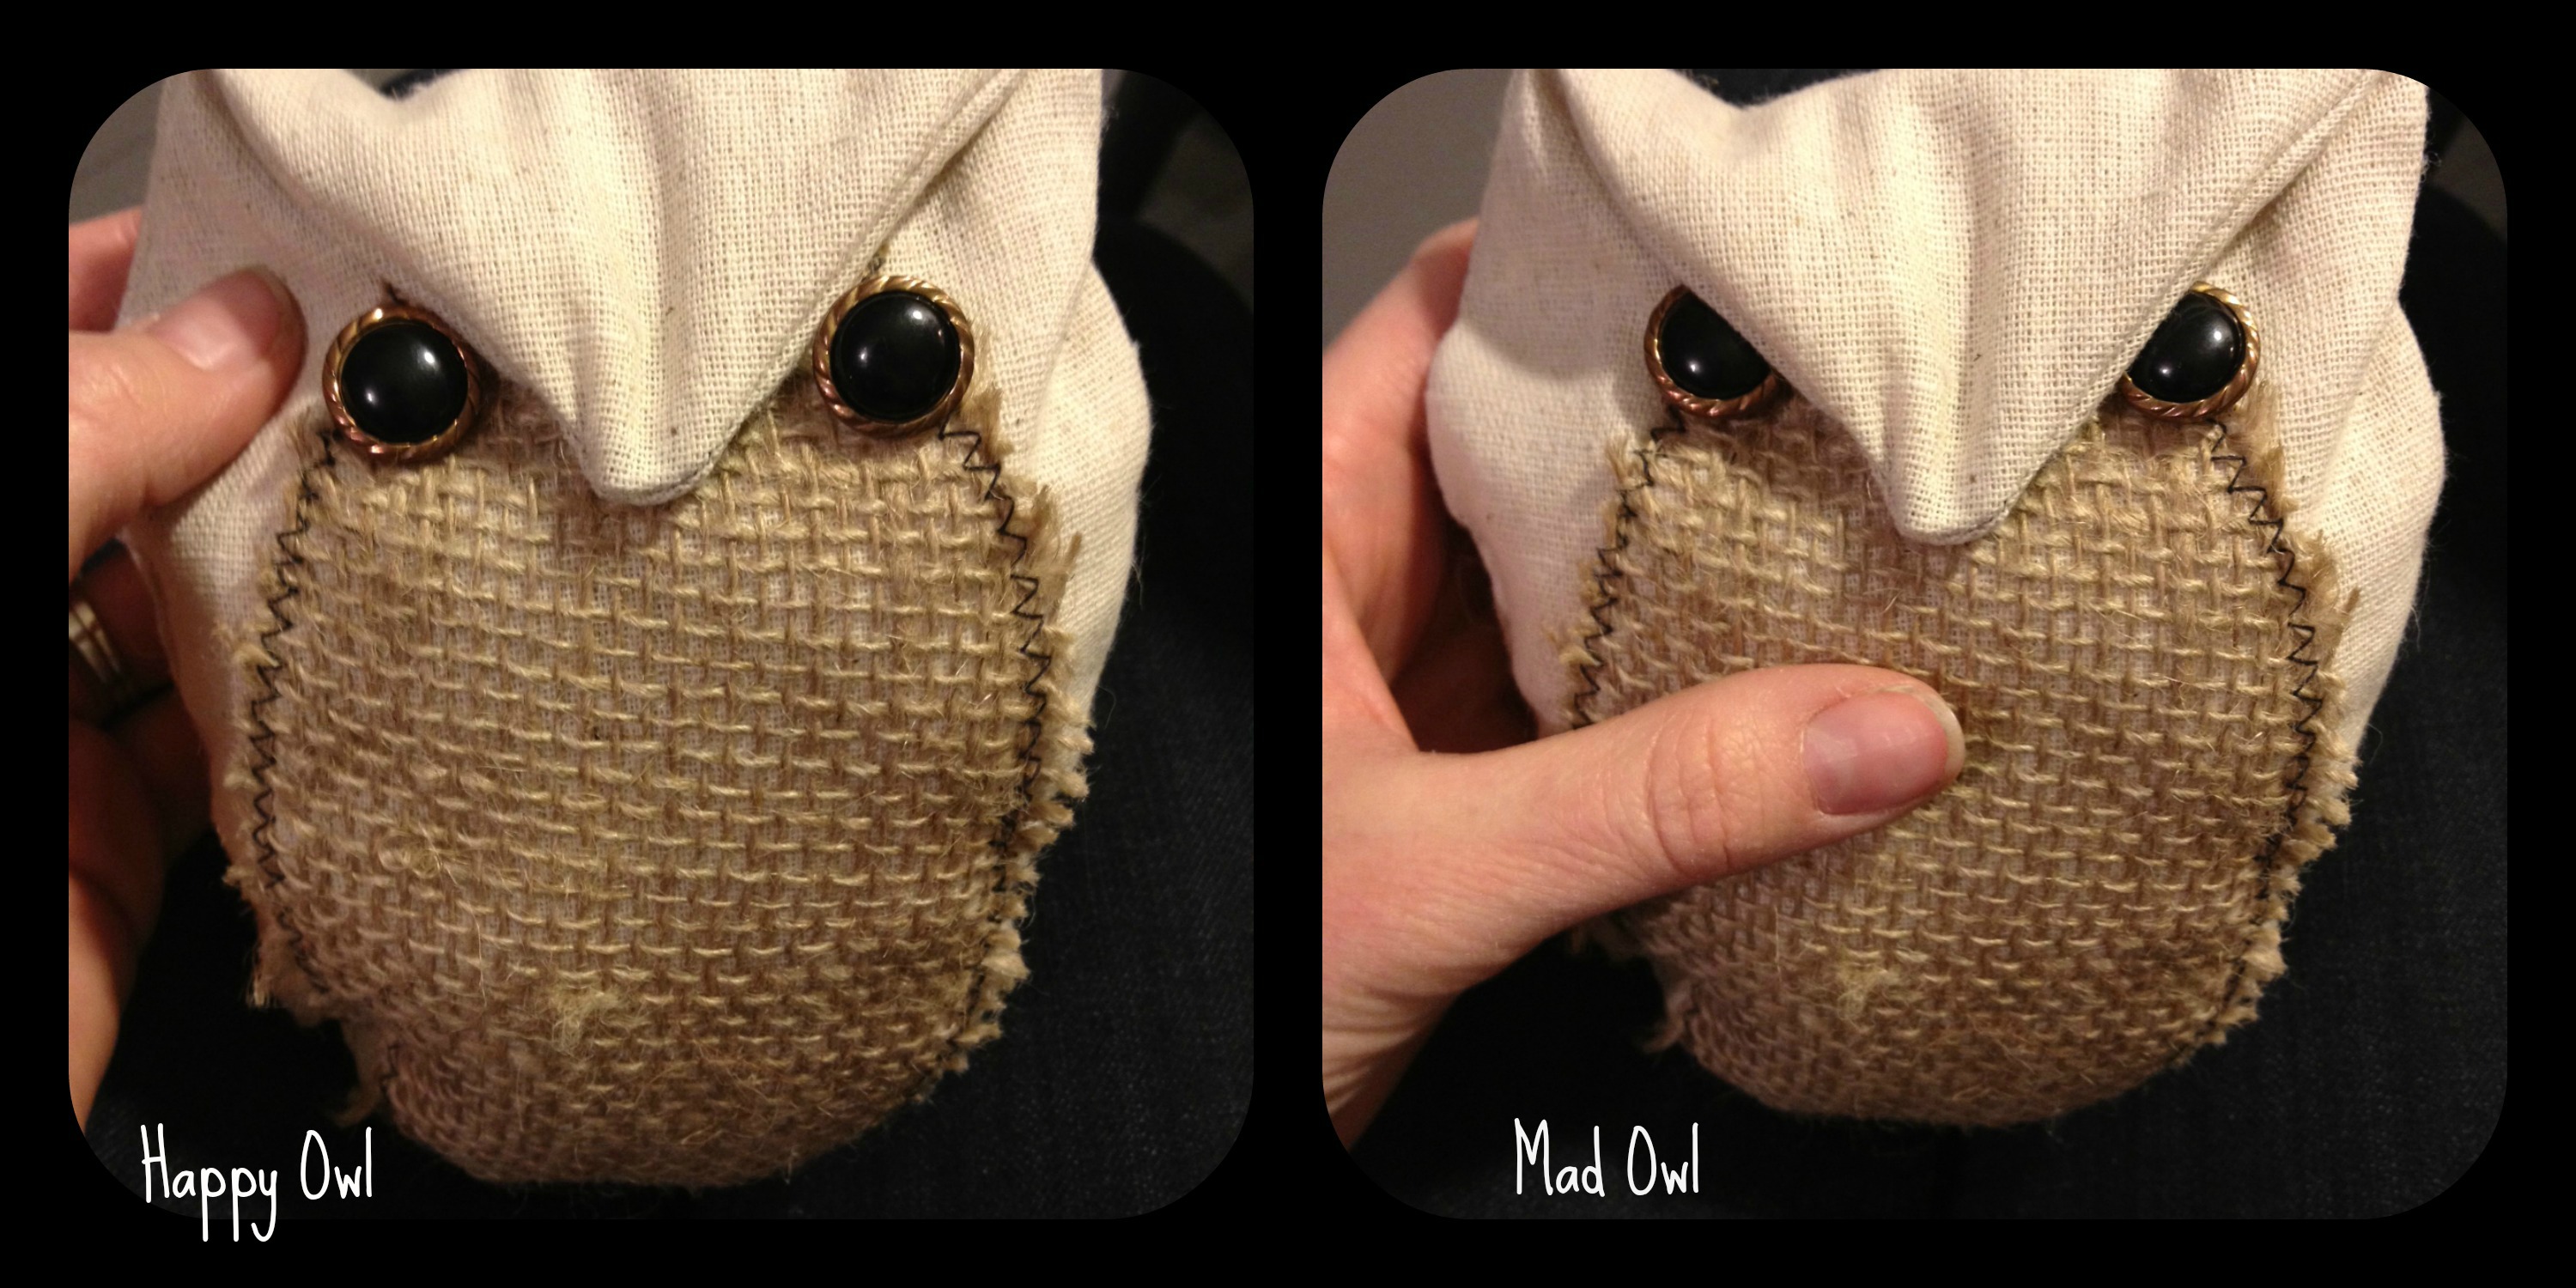
7) Finally, attach the button eyes where you choose. Enjoy your new mini owl!
This baby owl will have a special spot in the shower decor tomorrow. Can’t wait to see it all come together!
Thanks for stopping by,
Rustic Honey
these are adorable.
So stinkin’ cute! I love how you can change the emotions, ha!
These are SO cute! (lol I love happy owl/ mad owl) Looking forward to your nashville photos, I’ve always wanted to go!
now i might make this – its a cutey
Thank you! It was perfect at the baby shower yesterday! It will now find a home in baby Evie’s room! I kind of want to make another one now! 🙂
its awesome =P
That is a darling owl. I have friends who love owls and this would be perfect for them!!
I’m glad you like it! It turned out pretty cute! 🙂
super cute! I love owls & I LOVE this!!! definitely gonna try it!
Thank you Emma! You will have to let me know how it goes! 🙂
Hi just thought I’d let you no I made these adorable owls today and I think they turned out very well
Hi Angela! Thank you so much for stopping by and letting me know you enjoyed making these mini owls! That makes me so happy! 🙂 So glad this worked well for you and hope to see you again soon!
I am teaching a sewing clas this summer, I think the kids willlve this!!!!!!
That’s awesome Nancy! Hope it goes well! Thanks for stopping by my blog! 🙂